

How to Wire Bowfishing Lights to Battery Like a Pro (12V or 24V DC)
Bowfishing light wiring is easy to do if you have the right guidance. We've been in the business for a very long time now, and we've seen all the ways not to wire a bowfishing boat with lights. We've also seen first hand things you can do now to save you a headache later on. We'll dive into the details on all of this.
There are two different paths you can take when installing bowfishing lights: DIY Bowfishing Light Wiring or Utilizing our Plug and Play Building Block Power Wire Harness.
DIY Bowfishing Light Wiring (can take several hours to do)
DIY Option 1: Powering Lights on One Main Trunk Line
DIY Option 2: Run Wires to Lights Individually
Utilize our Plug and Play Building Block Power Wire Harness (can be done in less than 5 minutes)
DIY Bowfishing Light Wiring
There are two methods for DIY Bowfishing Light Wiring: connecting your lights together on one main trunk line, or running power wires individually to each of your bowfishing lights. Each method has its pro's and con's.
Option 1: Powering Lights on One Main Trunk Line
- One main power lead has a super clean look in terms of wiring appearance on your boat.
- As long as you use connect the Swamp Eye HD, Swamp Eye Gen 2.X Light Bars, or Swamp Eye Silent Series Lights to the main trunk line AFTER the plug that comes off the light, it is easy to unplug and swap out a light in the event the light is damaged down the road.
- Due to running on low voltage (DC), one main trunk line is going to require larger (and more expensive) wire because the amperage will be significantly higher.
- Any fractures or damage done to the trunk line wire will affect all the connected lights, instead of being isolated to just one light.
- Requires calculations for determining the proper wire size based on total amp draw.
- Here's how to power your lights on one main trunk line.
Option 2: Run Wires to Bowfishing Lights Independently
- In the event you have wiring problems down the road, it is super easy to trace your wires to lights individually as long as you label them to begin with.
- Since each wire is only carrying the amperage for one single light, you can use a significantly smaller size wire (and less expensive wire) although you will have to purchase more linear footage.
- If you have a wiring issue, it is only going to effect a single light compared to if a trunk line has an issue it is going to effect all the connected lights.
- Instead of one main trunk line for your positive terminal and one main trunk line for your negative terminal, you will have a set of two wires to hide for each bowfishing light you put in place. This can result in the necessity to use a larger diameter wire loom to give all of these wires a cleaner look.
- Can typically use the same AWG wire as what is on the lights, or upsize one AWG for increasing the length of the leads. (Upsizing means the next "lowest AWG" so going from 18 AWG to 16 AWG is upsizing. Going from 18 AWG to 20 AWG is downsizing.)
- Here's how to run wires to bowfishing lights independently.
Utilize our Plug and Play Building Block Power Wire Harness
This is equivalent to running your lights on a trunk line but utilizes our plug and play connections that take seconds to put together.
Key Points:
- Super easy and fast to install.
- Troubleshooting lights down the road is a breeze.
- Adding or removing lights down the road takes seconds to do.
- No calculations to determine wire size of each power lead, it's already sized accordingly.
- Connections are water tight and submersible: as long as you dielectric grease every plug and play connection and then put adhesive heatshrink over the connection, it can be submerged and is as good as having no connection at that point at all. This has been tested and proven with commercial fishing operations and several guides who are on saltwater 5-7 times per week.
Our Building Block Power Wire Harness consists of 4 components:
- Tee Connector for Power Cord Trunk Line (Support Up to 30 Amps)
- Power Cord Trunk Line Lead (Supports Up to 30 Amps)
- Transition Lead - Trunk Line Plug to Individual Light Plug (Supports Up to 30 Amps)
- Power Cord Lead with Trunk Line Battery Terminals (Support Up to 30 Amps)
Instead of purchasing individual components, you can also purchase a kit based on your light setup: Power Trunk Line Plug and Play Wiring Kit.
These components simply plug together in a matter of seconds, making wiring a breeze and eliminating the need for worrying about having to crimp wires and hunt down the right size (AWG) wire for your application.

We also have kits made depending on how many lights you are looking to purchase, you can find out more about this by checkout out our Power Trunk Line Plug and Play Wiring Kit here.
DIY Bowfishing Light Wiring
Within the realm of DIY bowfishing light wiring, there are two options to consider: powering lights on one main trunk line or running wires to your bowfishing lights independently.
DIY Option 1: Powering Lights on One Main Trunk Line
Here's a quick breakdown of the steps you need to put your bowfishing lights together on 1 main trunk line:
Step 1: Size Your Power Wire [AWG] Correctly Based on Wattage and Quantity of Bowfishing Lights.
Step 2: Determine Bowfishing Light Layout for Wiring
Step 3: Purchase All Material Needed Based on Light Layout
Step 4: Connect Lights Together
Step 5: Start Bowfishing!
Step 1: Size Your Power Wire [AWG] Correctly Based on Wattage and Quantity of Bowfishing Lights
The end goal is to determine how many total amps your bowfishing lights are going to draw, and then size your Main Power Trunk Line according to the AWG wire size capable of carrying this amperage capacity.
A.] Total Bowfishing Light Wattage = [# of Bowfishing Lights] X [Wattage of Each Bowfishing Light]
Example for Swamp Eye Gen 2.X Light Bar Setup
Example 1: 6x Swamp Eye Gen 2.X Light Bars [120W each]
Total Bowfishing Light Wattage = 6 X 120W = 720W
Example for Swamp Eye Silent Series Light Setup
Example 2: 6x Swamp Eye Silent Series Lights [70W each]
Total Bowfishing Light Wattage = 6 X 70W = 420W
B.] Total Bowfishing Light Amperage = [Total Bowfishing Light Wattage] / [Battery Voltage]
Example 1: Swamp Eye Gen 2.X Light Bar Setup
Example 1A: Running 6x Swamp Eye Gen 2.X Light Bars on 12V Battery
Total Bowfishing Light Amperage = 720W / 12V = 60 Amps
Example 1B: Running 6x Swamp Eye Gen 2.X Light Bars on 24V Battery
Total Bowfishing Light Amperage = 720W / 24V = 30 Amps
Example 2: Swamp Eye Silent Series Light Setup
Example 2A: Running 6x Swamp Eye Silent Series on 12V Battery
Total Bowfishing Light Amperage = 420W / 12V = 35 Amps
Example 2B: Running 6x Swamp Eye Silent Series on 24V Battery
Total Bowfishing Light Amperage = 420W / 24V = 17.5 Amps
C.] Determine Trunk Line Wire Size Based on Total Bowfishing Light Amperage
This can be determined with the following AWG wire charts for a 12V or 24V system.
What's the difference in the two? There is a "VDI" or voltage drop index that each chart accounts for. There is going to be more voltage drop at 12V than at 24V because of the voltage drop due to the higher current. Thus the reason we tell people 24V systems run more efficiently than 12V systems in most cases.


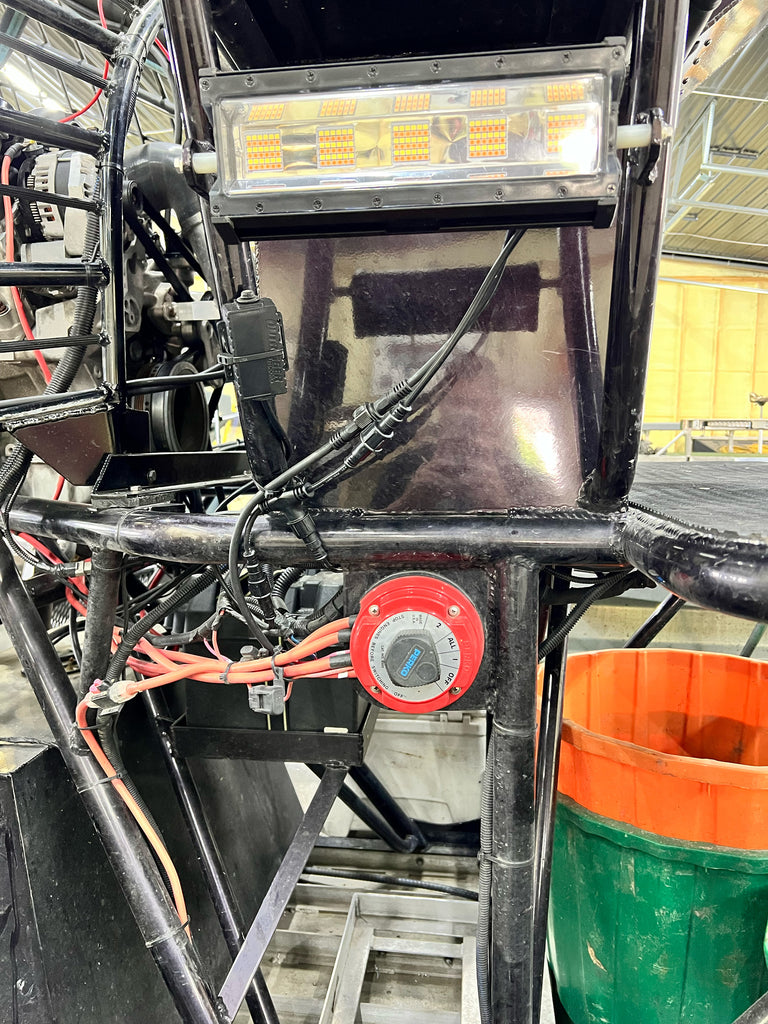
Please note: Due to DC voltage, you must use STRANDED MARINE GRADE (TINNED) WIRE. Do NOT use solid core wire with DC voltage on boats. Wire should be made from copper, do NOT use aluminum wire. For additional information on wire sizing and regulations for marine use please visit the governing body, American Boat and Yacht Counsel.
Let's revisit our Example 1 and Example 2 to see the difference in the wire size requirement.
Example 1: Swamp Eye Gen 2.X Light Bar Setup
- We determined running 6x Swamp Eye Gen 2.X Light Bars on 12V Battery draws 60 Amps.
- Based on the above 12V chart and assuming your trunk line is 10 ft long, this would require a 6 AWG wire.
- We determined running 6x Swamp Eye Gen 2.X Light Bars on 24V Battery draws 30 Amps.
- Based on the above 24V chart and assuming your trunk line is 10 ft long, this would require a 12 AWG wire.
Example 2: Swamp Eye Silent Series Light Setup
- We determined running 6x Swamp Eye Silent Series Lights on 12V Battery draws 35 Amps.
- Based on the above 12V chart and assuming your trunk line is 10 ft long, this would require a 8 AWG wire (rounding up to 40 amps on the chart).
- We determined running 6x Swamp Eye Silent Series Lights on 24V Battery draws 17.5 Amps.
- Based on the above 24V chart and assuming your trunk line is 10 ft long, this would require a 14 AWG wire (rounding up to 20 amps on the chart).
You can clearly see how the size of wire required can be significantly smaller and less expensive when running on 24V DC as compared to 12V DC.
Step 2: Determine Bowfishing Light Layout for Wiring
This step is easiest done if you have the lights on hand and just mount them up on your boat where you want them to go. Once this is done you can see first hand where you can run your wires and how much wire you will need to go from one light to the next.
Things to Keep in Mind:
- Separating each "side" or "bank" of lights out on different power wire trunk lines will keep amperage on each trunk line down, which in turn will make wire size smaller, reduce power losses through the wire, and is also much less expensive.
- Example: A customer purchases 10 lights. He wants to run 4 up front and 3 down each side. It is possible to connect all 10 lights together, but the wire size will be significantly larger and more expensive than if he only connected left side/bank of lights together, right side/bank of lights together, and front together. See step 1 for a more detailed explanation of wire sizing.
- Make sure all connections (crimped or soldered) are covered with adhesive heatshrink. This is even more important if you ever plan to be near saltwater.
- We strongly recommend soldering connections after you crimp them to give them the extra holding power and long term corrosion resistance. If you are doing this yourself, take the time to do it. You will be thankful later on.
- Your crimp connectors should be upsized one size above the AWG of your trunk line. The reason for this is because you will have your individual light power leads connecting into your trunk line power leads.
- If your trunk line is 8 AWG, you should get crimp connectors that will fit 6 AWG.
- If your trunk line is 10 AWG, you should get crimp connectors that will fit 8 AWG, and so on...
Step 3: Purchase All Material Needed Based on Light Layout
This will vary depending on how far apart you plan to space your bowfishing lights. We typically recommend spacing our Swamp Eye HD, Swamp Eye Gen 2.X Light Bars, or even Swamp Eye Silent Series Lights roughly 2-3 ft apart. However, there are many people who put them closer together and much further apart than this. It ultimately depends on what you feel most comfortable with for your application.
List of Materials:
- Red Trunk Line Wire (Marine Grade)**
- Black Trunk Line Wire (Marine Grade)**
- Crimp connectors**
- Adhesive heatshrink (we typically use 1/2-inch or 3/4-inch, depends on size of trunk line wire)
- Solder Wire
- Wire Loom (optional)
- Battery Terminals Sized for the AWG of Trunk Line
- Zip ties (optional)
**Make sure you use the size you determined in step 1.
Tools Needed:
- Soldering Iron
- Hand Crimper Tool
- Benzene Burner or Heat Gun for heating heatshrink.
Step 4: Connect Lights Together
Connecting your lights to your trunk line is a quick three step process: crimp, solder, and seal. Do not skip any of these steps, as they are all critical to the long term resilience of your bowfishing light setup.

The above photos show a red (positive) lead. You will need to do this process for the black (negative) lead as well. The DIY trunk line will consist of two leads, you can use wire loom to put over them once finished to make it look like one single lead.
When using our Swamp Eye® series of lights, make sure to utilize the plug and play battery terminal connector and remove the ring terminals from it to direct wire the lights into this main trunk line. The reason for this is because if you have an issue with a light down the road, the light remains "plug and play" so you can easily unplug it from the wire harness without having to re-do your wiring.
Step 5: Start Bowfishing!
Enjoy the labors of your hard work!

DIY Option 2: Run Wires to Lights Individually
There are unique situations where you might want to run power wires to your lights individually instead of on one main trunk line. Also, everyone has their own preferences and methods to the way they wire things. As long as the wires are properly sized, the method you choose will not matter in terms of performance.
Ultimately, what you are going to do is run the positive and negative leads from each of the lights to a bus bar. There will be 1x bus bar that is for your positive leads, and another bus bar that is for your negative leads. After the bus bar, you will have to connect the lights to the positive terminal of your battery (positive lead bus bar) and the negative terminal of your battery (negative lead bus bar).

General Recommendations:
- We strongly suggest that after crimping your wires onto the ring terminals that are typically included with the bus bar when you purchase it, solder the crimped connection. This will help avoid connection issues down the road when your boat is slapping waves.
- Make sure the wire going from the bus bar to the battery is UPSIZED and sized correctly for how many lights are being attached to the bus bar. See the charts in step 1 of the first DIY Method we presented for how to properly size your wire.
- The wire going to the individual lights need to be sized appropriately for the wattage of each of your individual lights. Most bowfishing lights are going to use 14 AWG or 16 AWG wiring going from light to bus bar depending on the wattage of the lights. See step 1 of the first DIY Method we presented for how to properly size this wire based on wattage and amperage.
- Utilize adhesive heatshrink to go over your crimped and soldered connections to insulate them. You will likely need 3/8" diameter adhesive heatshrink for individual leads and 1/2" for the larger lead going to the battery.